How to set up iPollo X1 for Ethereum mining?
How to Set Up iPollo X1 for Ethereum Mining?
Cryptocurrency mining has evolved significantly over the years, with hardware becoming more efficient, compact, and accessible. Among the latest innovations in this space is the iPollo X1, a mining device designed specifically for Ethash algorithm-based cryptocurrencies like Ethereum (ETH), Ethereum Classic (ETC), and others. Whether you’re a seasoned miner or a newcomer to the crypto world, the iPollo X1 offers a perfect blend of performance, efficiency, and ease of use. In this guide, we’ll walk you through the process of setting up your iPollo X1 for Ethereum mining, highlighting its key features and advantages along the way.
Product Introduction: What is the iPollo X1?
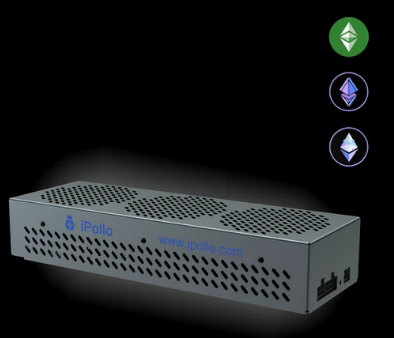
The iPollo X1 is a compact yet powerful mining rig engineered to deliver exceptional performance while maintaining energy efficiency. Designed for Ethash-based cryptocurrencies, it boasts a hashrate of 300-330 MH/s (±5%) and operates at a remarkably low power consumption of just 240W (±10%). This makes it an ideal choice for both home miners and small-scale operations looking to maximize profitability without incurring exorbitant electricity costs.
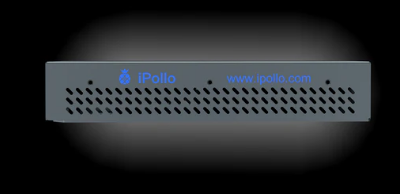
One of the standout features of the iPollo X1 is its compact form factor. Measuring just 300 x 100 x 50 mm and weighing 1.6 kg, it’s one of the smallest mining devices on the market. Despite its size, it doesn’t compromise on performance, thanks to its advanced cooling system and efficient thermal management. The device is available in two configurations: the Standard Edition, which includes the core mining unit and power supply, and the Advanced Edition, which comes with an Orange Pi set for standalone operation.
Why Choose the iPollo X1 for Ethereum Mining?
Before diving into the setup process, let’s explore why the iPollo X1 stands out as a top choice for Ethereum mining:
- Energy Efficiency: With a power consumption of only 240W, the iPollo X1 is one of the most energy-efficient mining devices available. This translates to lower electricity bills and higher profitability, especially in regions with high energy costs.
- Compact and Quiet: Its small size and low noise level (50dB) make it perfect for home mining. Unlike larger rigs that require dedicated spaces, the iPollo X1 can easily fit into any room without causing disruptions.
- User-Friendly Design: The iPollo X1 is designed with beginners in mind. Its intuitive setup process and straightforward operation make it accessible even to those new to cryptocurrency mining.
- Versatility: While optimized for Ethereum, the iPollo X1 supports multiple Ethash-based cryptocurrencies, including ETC, ETHF, QKC, CLO, POM, and ZIL. This flexibility allows miners to adapt to changing market conditions.
- Reliability and Support: Backed by a 180-day warranty and professional after-sales service, the iPollo X1 offers peace of mind to investors. Its modular design also ensures easy maintenance and component replacement.
Step-by-Step Guide to Setting Up the iPollo X1
Now that you understand the advantages of the iPollo X1, let’s walk through the setup process for Ethereum mining.
#### Step 1: Unbox and Inspect Your iPollo X1 When your iPollo X1 arrives, carefully unbox it and ensure all components are included. The Standard Edition should include:
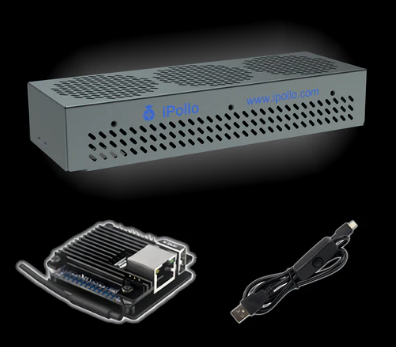
- The iPollo X1 mining unit
- Power supply unit (PSU)
- Ethernet cable
- Power cord
If you’ve purchased the Advanced Edition, you’ll also receive an Orange Pi set for standalone operation.
#### Step 2: Connect the Hardware
- Power Supply: Connect the PSU to the iPollo X1 using the provided cables. Ensure the connections are secure to avoid any power issues.
- Internet Connection: Use the Ethernet cable to connect the iPollo X1 to your router or modem. A stable internet connection is crucial for efficient mining.
- Orange Pi (Advanced Edition Only): If you’re using the Advanced Edition, connect the Orange Pi to the iPollo X1 and configure it according to the manufacturer’s instructions.
#### Step 3: Configure the iPollo X1
- Access the Device: Open a web browser on your computer and enter the IP address of the iPollo X1. This information can usually be found in the user manual or on the device itself.
- Log In: Use the default username and password (provided in the manual) to log in to the device’s interface.
- Set Up Mining Pool: Navigate to the mining pool settings and enter the details of your preferred Ethereum mining pool. Popular options include Ethermine, F2Pool, and Nanopool. You’ll need to provide your wallet address and select a server location.
- Adjust Settings: Customize the mining settings based on your preferences. For example, you can adjust the fan speed or overclock the device to maximize performance.
#### Step 4: Start Mining Once everything is configured, click the “Start Mining” button to begin. The iPollo X1 will start solving complex algorithms to mine Ethereum, and you’ll begin earning rewards based on your hashrate and the mining pool’s payout structure.
#### Step 5: Monitor and Optimize Use the device’s interface to monitor its performance, including hashrate, temperature, and power consumption. Regularly check for firmware updates and optimize your settings to ensure maximum efficiency.
Practical Tips for Maximizing Your iPollo X1’s Performance
- Optimal Placement: Place the iPollo X1 in a well-ventilated area to prevent overheating. While the device has an advanced cooling system, proper airflow can further enhance its performance.
- Regular Maintenance: Clean the device periodically to remove dust and debris. This helps maintain optimal cooling and extends the lifespan of the hardware.
- Stay Updated: Keep an eye on the latest developments in the Ethereum ecosystem, such as network upgrades or changes in mining difficulty. This will help you adapt your strategy for better profitability.
- Join a Community: Engage with other iPollo X1 users in online forums or social media groups. Sharing tips and experiences can help you troubleshoot issues and discover new optimization techniques.
Conclusion
The iPollo X1 is a game-changer in the world of cryptocurrency mining, offering a perfect balance of performance, efficiency, and accessibility. Its compact design, low power consumption, and user-friendly setup make it an excellent choice for both beginners and experienced miners. By following this guide, you can easily set up your iPollo X1 for Ethereum mining and start earning rewards in no time.
Whether you’re looking to dip your toes into the world of crypto mining or expand your existing operations, the iPollo X1 is a reliable and cost-effective solution. With its advanced features and robust support framework, it’s no wonder that the iPollo X1 is quickly becoming a favorite among miners worldwide. Happy mining!