Replacing power supplies, control boards, and chips in iPollo V1 mini WiFi-260M
Replacing Power Supplies, Control Boards, and Chips in iPollo V1 mini WiFi-260M: A Practical Guide for Mining Operators
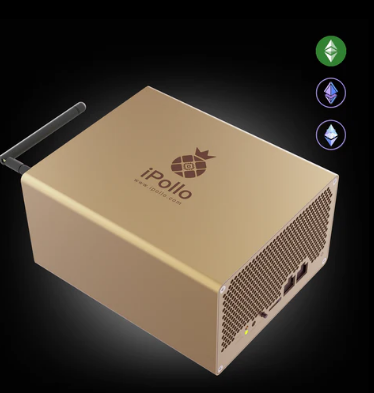
The iPollo V1 mini WiFi-260M has established itself as a game-changer in the world of home-based cryptocurrency mining. Its compact design, whisper-quiet operation, and impressive 260 MH/s hashrate make it an attractive option for both beginners and seasoned miners. However, like any piece of hardware, the V1 mini WiFi-260M may require maintenance over time, particularly when it comes to power supplies, control boards, and chips. In this article, we’ll delve into the practical aspects of replacing these components, ensuring your mining operations remain efficient and profitable.
Understanding the iPollo V1 mini WiFi-260M
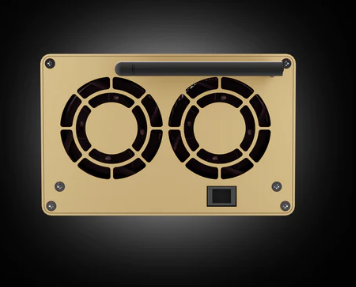
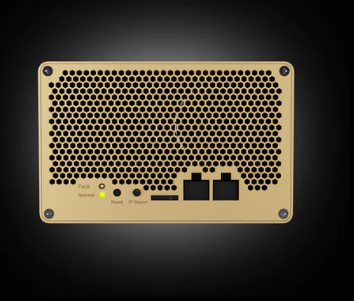
Before diving into component replacement, it’s essential to understand the machine’s architecture. The V1 mini WiFi-260M is designed with simplicity and efficiency in mind. Its compact dimensions (179 x 143 x 90 mm) and lightweight build (2.1 kg) make it easy to install in various settings, while its low power consumption (220W ±10%) and quiet operation (40dB) ensure it’s suitable for home use.
The miner supports multiple algorithms, including Ethash, ETHF, ETC, QKC, CLO, POM, and ZIL, making it versatile for mining a range of cryptocurrencies. Its 6.0GB memory configuration ensures smooth performance, even under heavy workloads. However, as with any mining device, certain components are subject to wear and tear, and knowing how to replace them can save you time, money, and downtime.
When to Replace Components
Regular maintenance is critical to keeping your iPollo V1 mini WiFi-260M running at peak performance. Here are some signs that indicate it’s time to replace specific components:
- Power Supply Issues: If the miner fails to power on, experiences intermittent shutdowns, or shows inconsistent performance, the power supply unit (PSU) may be faulty.
- Control Board Failures: Problems with the control board can manifest as unresponsive controls, connectivity issues, or failure to initialize mining operations.
- Chip Malfunctions: If the hashrate drops significantly or the miner generates errors related to specific chips, it may be time to inspect and replace damaged chips.
Replacing the Power Supply
The power supply is the lifeblood of your mining device, converting AC power from your outlet into the DC power needed by the miner. Over time, PSUs can degrade due to heat, dust, or electrical surges. Here’s how to replace the power supply in your V1 mini WiFi-260M:
- Power Down and Disconnect: Ensure the miner is completely powered off and unplugged from the power source.
- Open the Case: Use a screwdriver to remove the screws securing the outer casing. Carefully open the case to access the internal components.
- Locate the PSU: The power supply is typically located near the power input port. Disconnect all cables connected to the PSU.
- Remove the Old PSU: Unscrew the mounting screws securing the PSU and gently remove it from the case.
- Install the New PSU: Place the new PSU in the same position and secure it with screws. Reconnect all cables, ensuring they are properly seated.
- Close the Case: Reassemble the outer casing and power on the miner to test the new PSU.
Pro Tip: Always use a high-quality replacement PSU that matches the miner’s specifications to avoid compatibility issues or damage.
Replacing the Control Board
The control board acts as the brain of the miner, managing operations and communication with the mining pool. If it fails, the miner may become unresponsive or fail to function altogether. Here’s how to replace it:
- Power Down and Disconnect: As with any repair, start by powering down and unplugging the miner.
- Open the Case: Remove the screws and open the case to access the internal components.
- Locate the Control Board: The control board is typically situated near the center of the miner and is connected to various components via cables.
- Disconnect Cables: Carefully disconnect all cables attached to the control board. Take note of their positions to ensure proper reconnection.
- Remove the Old Board: Unscrew the mounting screws and gently remove the old control board.
- Install the New Board: Place the new control board in the same position and secure it with screws. Reconnect all cables, ensuring they match their original positions.
- Close the Case: Reassemble the outer casing and power on the miner to test the new control board.
Pro Tip: Before installing the new control board, check for firmware updates from iPollo to ensure compatibility and optimal performance.
Replacing Chips
The chips in the V1 mini WiFi-260M are responsible for performing the complex calculations required for mining. If one or more chips fail, the miner’s hashrate will drop, reducing its profitability. Here’s how to replace damaged chips:

- Power Down and Disconnect: Ensure the miner is powered off and unplugged.
- Open the Case: Remove the screws and open the case to access the internal components.
- Locate the Chips: The chips are typically mounted on a series of boards within the miner. Identify the specific chips showing errors or malfunctions.
- Remove the Old Chips: Use a soldering iron to carefully desolder the damaged chips from the board. Take care not to damage surrounding components.
- Install the New Chips: Solder the replacement chips onto the board, ensuring proper alignment and connection.
- Close the Case: Reassemble the outer casing and power on the miner to test the new chips.
Pro Tip: If you’re not experienced with soldering, consider seeking assistance from a professional technician to avoid damaging the miner.
Maintaining Your iPollo V1 mini WiFi-260M
Preventive maintenance can significantly extend the lifespan of your miner and reduce the need for component replacements. Here are some best practices:
- Keep It Clean: Regularly clean the miner to remove dust and debris that can cause overheating.
- Monitor Temperatures: Ensure the miner operates within the recommended temperature range (10-25°C) to prevent thermal damage.
- Update Firmware: Keep the miner’s firmware up to date to benefit from performance improvements and bug fixes.
- Inspect Components: Periodically inspect the power supply, control board, and chips for signs of wear or damage.
Why Choose iPollo V1 mini WiFi-260M?
Despite the occasional need for maintenance, the iPollo V1 mini WiFi-260M remains a top choice for home miners. Its compact design, energy efficiency, and user-friendly operation make it an ideal entry point for newcomers, while its robust performance ensures it meets the demands of experienced miners. Additionally, iPollo’s reputation for quality and reliability, backed by a 180-day warranty and extensive support network, provides peace of mind for users.
Conclusion
Replacing power supplies, control boards, and chips in the iPollo V1 mini WiFi-260M is a straightforward process that can save you from costly downtime. By following the steps outlined in this guide and adopting preventive maintenance practices, you can ensure your miner continues to operate at peak performance. Whether you’re a beginner or a seasoned miner, the V1 mini WiFi-260M offers a reliable and efficient solution for your cryptocurrency mining needs.
With its combination of performance, affordability, and ease of maintenance, the iPollo V1 mini WiFi-260M is a valuable addition to any mining setup. Keep it well-maintained, and it will reward you with consistent returns for years to come.