iPollo V1 assembly guide: Step-by-step instructions
iPollo V1 Assembly Guide: Step-by-Step Instructions
Cryptocurrency mining has evolved significantly over the years, and the iPollo V1 is a testament to this progress. Designed specifically for Ethash algorithm mining, the iPollo V1 offers an impressive hashrate of 3600 MH/s (±10%), making it a top choice for both institutional miners and serious enthusiasts. Whether you’re setting up your first mining rig or expanding an existing operation, this assembly guide will walk you through the process of getting your iPollo V1 up and running efficiently.
Product Introduction: The iPollo V1
The iPollo V1 is a professional-grade mining solution engineered for optimal performance in Ethash-based cryptocurrency mining. With its robust build and advanced thermal management system, it operates efficiently within a temperature range of 10-25°C. The unit features 6GB of designed memory (5.8GB available), ensuring stable performance across multiple Ethash-based cryptocurrencies such as ETHF, ETC, QKC, CLO, POM, and ZIL.
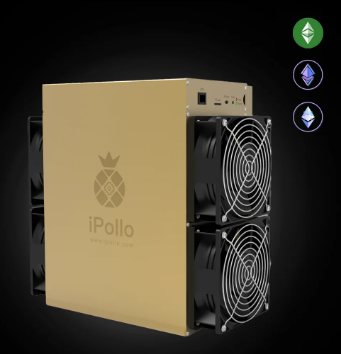
Measuring 314 x 194 x 290mm and weighing 13kg, the iPollo V1 combines a compact form factor with powerful capabilities. Its power efficiency is carefully balanced, operating at 3100W (±10%), making it a sustainable choice for long-term mining operations.
Product Advantages
Before diving into the assembly process, it’s essential to understand the key advantages of the iPollo V1:
- Enterprise-Grade Reliability: Built on iPollo’s established reputation, the V1 offers advanced engineering and manufacturing excellence, backed by comprehensive quality control measures.
- Optimized Investment Strategy: With competitive hashrate performance and accessible pricing, the V1 presents an attractive value proposition for crypto investors.
- Comprehensive Support Infrastructure: Beyond the standard 180-day warranty, users benefit from a robust after-sales support system and ready availability of replacement components.
- Versatile Mining Capabilities: Compatibility with multiple Ethash-based cryptocurrencies allows miners to adapt their strategy based on market conditions.
- Global Accessibility: Strategic partnerships with major logistics providers ensure reliable worldwide distribution.
- Sustainable Performance: Efficient thermal management and power consumption support long-term operation, while the modular design facilitates easy maintenance.
- User-Centric Design: An intuitive operational interface and comprehensive documentation make the V1 suitable for both newcomers and experienced operators.
Step-by-Step Assembly Guide
Step 1: Unboxing and Inspection
Before you begin assembling your iPollo V1, carefully unbox all components and inspect them for any signs of damage during transit. The package should include:

- The iPollo V1 miner
- Power supply unit (PSU)
- Power cables
- Ethernet cable
- User manual and warranty information
Ensure that all components are present and undamaged. If you notice any issues, contact your supplier immediately.
Step 2: Setting Up the Mining Location
Choosing the right location for your iPollo V1 is crucial for optimal performance. Consider the following factors:
- Ventilation: Ensure the area has adequate ventilation to dissipate heat generated by the miner.
- Temperature: Maintain an ambient temperature between 10-25°C to prevent overheating.
- Power Supply: Verify that your power outlet can handle the miner’s 3100W (±10%) power consumption.
- Internet Connection: A stable internet connection is essential for efficient mining operations.
Step 3: Connecting the Power Supply
- Position the PSU: Place the power supply unit near the iPollo V1, ensuring it’s easily accessible for cable management.
- Connect the Power Cables: Attach the provided power cables from the PSU to the iPollo V1. Ensure all connections are secure.
- Plug into Power Outlet: Connect the PSU to a power outlet that can handle the miner’s power requirements. Double-check the voltage compatibility to avoid any electrical issues.
Step 4: Network Setup
- Ethernet Connection: Use the provided Ethernet cable to connect the iPollo V1 to your router or network switch. A wired connection is recommended for stability.
- Check Network Status: Ensure the miner has a stable internet connection by checking the network status on the miner’s interface.
Step 5: Initial Configuration
- Access the Miner Interface: Open a web browser and enter the IP address of your iPollo V1 (found in the user manual) to access the miner’s interface.
- Login: Enter the default username and password provided in the documentation. It’s recommended to change these credentials for security purposes.
- Configure Mining Pool: Input the details of your preferred mining pool, including the pool address, port, and worker credentials. If you don’t have a mining pool, research and select one that suits your needs.
- Save Settings: After entering all necessary information, save the settings and restart the miner to apply the changes.
Step 6: Monitoring and Maintenance
Once your iPollo V1 is up and running, regular monitoring and maintenance are essential to ensure optimal performance:

- Monitor Hashrate: Keep an eye on the hashrate to ensure it remains stable and within the expected range.
- Check Temperature: Regularly monitor the miner’s temperature to prevent overheating. Adjust ventilation if necessary.
- Update Firmware: Periodically check for firmware updates from iPollo to enhance performance and security.
- Clean Dust: Dust accumulation can affect cooling efficiency. Clean the miner and surrounding area regularly to maintain optimal airflow.
Step 7: Troubleshooting Common Issues
Even with proper setup, you may encounter issues during operation. Here are some common problems and their solutions:
- No Power: Ensure all power cables are securely connected and the power outlet is functional. Check the PSU for any signs of damage.
- Low Hashrate: Verify network stability and mining pool settings. Check for firmware updates and ensure the miner is not overheating.
- Overheating: Improve ventilation and consider additional cooling solutions if ambient temperature is high. Clean dust from the miner and surrounding area.
- Connection Issues: Double-check Ethernet connections and ensure your router is functioning correctly. Restart the miner and router if necessary.
Practical Tips for Maximizing Efficiency
To get the most out of your iPollo V1, consider the following tips:
- Join a Reliable Mining Pool: Research and join a mining pool with a good reputation and low fees to maximize your earnings.
- Optimize Power Costs: If electricity costs are high in your area, consider mining during off-peak hours or explore renewable energy options.
- Regular Maintenance: Schedule regular maintenance checks to keep your miner in top condition and prevent unexpected downtime.
- Stay Informed: Keep up with the latest trends and developments in the cryptocurrency mining industry to adapt your strategy as needed.
Conclusion
The iPollo V1 is a powerful and reliable mining solution designed for Ethash algorithm operations. By following this step-by-step assembly guide, you can set up your miner efficiently and start maximizing your cryptocurrency mining potential. With its enterprise-grade reliability, versatile mining capabilities, and user-centric design, the iPollo V1 is an excellent choice for both novice and experienced miners.
Remember, successful mining requires not only the right hardware but also diligent monitoring and maintenance. By staying informed and proactive, you can ensure that your iPollo V1 operates at peak performance, delivering consistent results for your mining endeavors. Happy mining!