How to replace parts on Bitaxe Ultra ASIC miner?
How to Replace Parts on Bitaxe Ultra ASIC Miner?
The Bitaxe Ultra is a revolutionary open-source ASIC miner that has redefined the Bitcoin mining landscape. With its compact design, exceptional energy efficiency, and innovative architecture, it has become a favorite among solo miners and cryptocurrency enthusiasts. However, like any piece of hardware, the Bitaxe Ultra may require part replacements over time to maintain optimal performance. This article provides a comprehensive guide on how to replace parts on the Bitaxe Ultra ASIC miner, ensuring that your mining operations remain efficient and uninterrupted.
Introduction to the Bitaxe Ultra ASIC Miner
Before diving into the specifics of part replacement, it’s essential to understand the key components and features of the Bitaxe Ultra that make it a standout in the world of Bitcoin mining.
Key Features
- Open-Source Architecture: The Bitaxe Ultra is the world’s first open-source ASIC miner, allowing users to verify, modify, and optimize their mining operations with complete transparency.
- Energy Efficiency: With a power consumption of just 15 watts and a hashrate of 500 GH/s, the Bitaxe Ultra sets a new standard for energy-efficient mining.
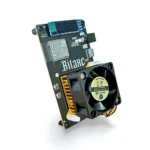
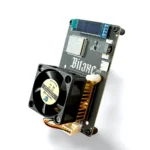
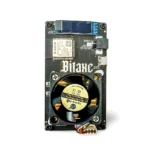
- Compact Design: Measuring only 10 x 6 cm and weighing 73g, the Bitaxe Ultra is designed for flexibility and ease of deployment in various environments.
- Advanced Cooling System: The Bitaxe Ultra offers both standard and premium Noctua fan options, ensuring optimal thermal management for sustained performance.
- ESP32-S3-WROOM-1 Development Board: This robust microcontroller, equipped with 16MB of flash storage, provides a solid foundation for mining operations and firmware flexibility.
Understanding these features is crucial for identifying which parts may need replacement and how those replacements can impact your mining efficiency.
Common Parts That May Need Replacement
Over time, certain components of the Bitaxe Ultra may wear out or require upgrades. The most common parts that may need replacement include:
- Cooling Fans: Continuous operation can lead to fan wear and tear, reducing cooling efficiency.
- Power Supply Unit (PSU): The PSU may degrade over time, affecting the miner’s performance and stability.
- ASIC Chips: While the BM1366 ASIC chip is durable, it may eventually require replacement due to prolonged use.
- Development Board: The ESP32-S3-WROOM-1 development board may need upgrading or replacement to accommodate new firmware or enhancements.
- Cables and Connectors: Physical connections can degrade, leading to potential issues in power delivery or data transmission.
Step-by-Step Guide to Replacing Parts on the Bitaxe Ultra
1. Replacing the Cooling Fan
Why Replace? The cooling fan is critical for maintaining optimal temperatures during mining operations. A faulty fan can lead to overheating, reducing the miner’s efficiency and lifespan.
Steps:
- Power Down: Ensure the Bitaxe Ultra is powered off and disconnected from the power source.
- Access the Fan: Open the miner’s casing to access the internal components. The cooling fan is typically located near the ASIC chips.
- Remove the Old Fan: Disconnect the fan’s power cable and unscrew it from its mounting bracket.
- Install the New Fan: Secure the new fan in place, reconnect the power cable, and ensure it’s firmly attached.
- Test the Fan: Power on the miner and verify that the new fan operates correctly and maintains proper airflow.
2. Replacing the Power Supply Unit (PSU)
Why Replace? A failing PSU can cause unstable power delivery, leading to inconsistent mining performance or hardware damage.
Steps:

- Power Down: Disconnect the Bitaxe Ultra from the power source.
- Remove the Old PSU: Carefully disconnect the PSU from the miner’s power input and remove it from its housing.
- Install the New PSU: Connect the new PSU to the miner’s power input and secure it in place.
- Power On and Test: Reconnect the miner to the power source and ensure it powers on correctly, with stable power delivery.
3. Replacing the ASIC Chip
Why Replace? While the BM1366 ASIC chip is designed for durability, prolonged use may necessitate its replacement to restore optimal hashrate and efficiency.
Steps:

- Power Down: Ensure the miner is powered off and disconnected.
- Access the ASIC Chip: Open the miner’s casing to locate the BM1366 ASIC chip.
- Remove the Old Chip: Carefully desolder the old ASIC chip from the circuit board.
- Install the New Chip: Solder the new BM1366 ASIC chip in place, ensuring proper alignment and connection.
- Test the Miner: Power on the miner and verify that the new ASIC chip is functioning correctly, achieving the expected hashrate.
4. Upgrading the Development Board
Why Upgrade? Upgrading the ESP32-S3-WROOM-1 development board can provide enhanced functionality, support for new firmware, or improved performance.
Steps:
- Power Down: Disconnect the miner from the power source.
- Access the Development Board: Open the miner’s casing to locate the ESP32-S3-WROOM-1 development board.
- Remove the Old Board: Carefully disconnect the old development board from its connections and remove it from the miner.
- Install the New Board: Connect the new development board, ensuring all connections are secure and properly aligned.
- Test the Miner: Power on the miner and verify that the new development board operates correctly, supporting the desired firmware and functionalities.
5. Replacing Cables and Connectors
Why Replace? Degraded cables and connectors can lead to power inconsistencies or data transmission issues, impacting mining performance.

Steps:
- Power Down: Disconnect the miner from the power source.
- Identify Faulty Cables/Connectors: Inspect the miner’s internal and external cables and connectors for signs of wear or damage.
- Remove the Old Components: Disconnect and remove the faulty cables or connectors.
- Install New Components: Connect the new cables or connectors, ensuring they are securely attached.
- Test the Miner: Power on the miner and verify that the new components function correctly, with stable power and data transmission.
Practical Tips for Maintaining the Bitaxe Ultra
- Regular Inspections: Periodically inspect the miner’s components for signs of wear or damage, addressing issues promptly to prevent further complications.
- Optimal Cooling: Ensure the cooling system is functioning correctly, maintaining optimal temperatures to prolong the miner’s lifespan.
- Firmware Updates: Keep the miner’s firmware up to date, leveraging community-driven improvements and optimizations.
- Clean Environment: Operate the miner in a clean, dust-free environment to minimize the risk of component degradation.
- Backup Power: Use a reliable power source and consider implementing backup power solutions to prevent disruptions in mining operations.
Conclusion
The Bitaxe Ultra ASIC miner is a remarkable device that combines innovative open-source architecture with efficient ASIC technology, making solo Bitcoin mining accessible and meaningful. However, maintaining its optimal performance requires periodic part replacements and diligent upkeep. By following this guide, you can confidently replace essential components such as cooling fans, the PSU, ASIC chips, the development board, and cables/connectors, ensuring your Bitaxe Ultra continues to deliver exceptional mining performance.
Whether you’re a seasoned mining operator or a newcomer to the world of cryptocurrency, understanding how to effectively maintain and replace parts on the Bitaxe Ultra is crucial for maximizing your mining efficiency and contributing to the decentralization and security of the Bitcoin network. With its compact design, energy efficiency, and community-driven evolution, the Bitaxe Ultra stands as a testament to the future of sustainable and accessible Bitcoin mining.