How to integrate Bitaxe Ultra with a Bitcoin node for mining?
How to Integrate Bitaxe Ultra with a Bitcoin Node for Mining?
The world of Bitcoin mining has evolved significantly over the years, and the *Bitaxe Ultra* stands as a testament to this evolution. This revolutionary ASIC Bitcoin solo miner combines cutting-edge technology with an open-source architecture, making it a game-changer for both hobbyists and professional miners. One of its most compelling features is its ability to integrate seamlessly with a Bitcoin node, enabling solo mining that is both efficient and meaningful. In this article, we’ll explore how to integrate the Bitaxe Ultra with a Bitcoin node, why this setup is advantageous, and the practical steps to get started.
Why Integrate Bitaxe Ultra with a Bitcoin Node?
Before diving into the technical details, it’s important to understand the significance of integrating the Bitaxe Ultra with a Bitcoin node. Mining Bitcoin traditionally requires joining a mining pool, where miners combine their computational power to increase their chances of earning rewards. However, this approach centralizes control and diminishes the decentralization ethos of Bitcoin.
By integrating the Bitaxe Ultra with a Bitcoin node, you can participate in solo mining, which allows you to:
- Contribute to Network Decentralization: Running your own node ensures that you’re an active participant in the Bitcoin network, enhancing its security and resilience.
- Control Your Mining Operations: You have full control over block templates and transaction selection, aligning your mining activities with your principles.
- Earn Block Rewards Directly: Instead of sharing rewards with a pool, you retain 100% of the block reward if you successfully mine a block.
The Bitaxe Ultra’s open-source architecture and advanced ASIC technology make it uniquely suited for this purpose, offering a powerful yet energy-efficient mining solution.
Understanding the Bitaxe Ultra: A Technical Overview
To appreciate how the Bitaxe Ultra integrates with a Bitcoin node, let’s first break down its key features:
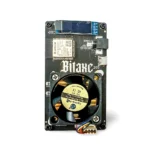
- ASIC Chip: Powered by the BM1366 chip, the Bitaxe Ultra delivers a hashrate of 500 GH/s while consuming just 15 watts of power. This efficiency ensures that solo mining remains cost-effective.
- Open-Source Architecture: As the world’s first open-source ASIC miner, the Bitaxe Ultra allows users to inspect, modify, and optimize its firmware, fostering transparency and innovation.
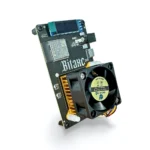
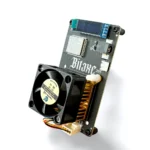
- Compact Design: Measuring just 10 x 6 cm and weighing 73g, the Bitaxe Ultra is designed for flexibility, making it easy to deploy in various setups.
- Advanced Cooling Options: With both standard and premium Noctua fan options, the device maintains optimal thermal performance even during continuous operation.
These features make the Bitaxe Ultra an ideal choice for miners looking to integrate with a Bitcoin node and participate in solo mining.
Step-by-Step Guide to Integrating Bitaxe Ultra with a Bitcoin Node
Step 1: Set Up Your Bitcoin Node
The first step is to run a full Bitcoin node. This node will serve as the backbone of your mining operation, providing you with the latest blockchain data and enabling you to create block templates. Here’s how to set it up:
- Download Bitcoin Core: Visit the official Bitcoin website and download the Bitcoin Core software for your operating system.
- Install and Sync the Node: Run the installation and allow the node to sync with the Bitcoin network. This process can take several hours or days, depending on your internet speed and hardware.
- Ensure Security: Configure your node to operate securely by enabling features like peer authentication and firewall settings.
Step 2: Connect the Bitaxe Ultra to Your Node
Once your Bitcoin node is operational, you’ll need to connect the Bitaxe Ultra to it. This involves configuring the miner to communicate with your node. Here’s how:
- Access the Bitaxe Ultra Interface: Connect the Bitaxe Ultra to your computer or network and access its web interface.
- Configure the Node Connection: In the miner’s settings, input the IP address of your Bitcoin node and the necessary credentials (if required).
- Verify Communication: Ensure that the Bitaxe Ultra is successfully receiving block templates and other data from your node.
Step 3: Optimize Mining Parameters
To maximize your mining efficiency, you’ll need to fine-tune the Bitaxe Ultra’s settings:
- Adjust Hashrate Settings: While the Bitaxe Ultra operates at 500 GH/s by default, you can adjust its performance based on your power constraints and cooling capabilities.
- Monitor Temperature: Use the device’s built-in temperature monitoring tools to ensure it stays within safe operating limits.
- Enable Block Notifications: Configure your node to notify the Bitaxe Ultra when a new block is mined, ensuring that your miner is always working on the latest block template.
Step 4: Start Mining
With everything configured, you’re ready to start solo mining with the Bitaxe Ultra. Monitor its performance through the web interface and keep an eye on your Bitcoin node’s logs to track your progress.
Advantages of Using Bitaxe Ultra with a Bitcoin Node
Integrating the Bitaxe Ultra with a Bitcoin node offers several practical and philosophical benefits:
- Enhanced Network Participation: By running your own node, you contribute to Bitcoin’s decentralization and security.
- Full Control Over Mining: You decide which transactions to include in your block templates, aligning your mining activities with your values.
- Cost Efficiency: The Bitaxe Ultra’s energy-efficient design ensures that solo mining remains economically viable, even for individual miners.
- Open-Source Flexibility: The open-source nature of the Bitaxe Ultra allows you to customize its firmware and adapt it to your specific needs.
Real-World Applications and Use Cases
The Bitaxe Ultra’s integration with a Bitcoin node opens up a range of possibilities:
- Educational Mining: For those new to Bitcoin mining, this setup provides a hands-on way to understand the mining process and the Bitcoin network.
- Decentralized Mining Operations: Small-scale miners can use the Bitaxe Ultra to participate in solo mining without relying on centralized pools.
- Custom Mining Solutions: Developers and enthusiasts can leverage the open-source architecture to create tailored mining solutions for specific use cases.
Conclusion: Empowering Miners with Bitaxe Ultra
The Bitaxe Ultra is more than just a mining device; it’s a tool that empowers miners to take control of their operations and contribute meaningfully to the Bitcoin network. By integrating it with a Bitcoin node, you can participate in solo mining, enhance network decentralization, and enjoy the full benefits of your mining efforts. Whether you’re a hobbyist or a professional miner, the Bitaxe Ultra offers a practical, efficient, and transparent solution for modern Bitcoin mining.
As the cryptocurrency landscape continues to evolve, devices like the Bitaxe Ultra will play a crucial role in fostering innovation and decentralization. So, if you’re ready to take your mining operations to the next level, consider integrating the Bitaxe Ultra with a Bitcoin node and experience the future of solo mining firsthand.