How to install C13 to C14 power cord for Antminer series mining equipment?
How to Install C13 to C14 Power Cord for Antminer Series Mining Equipment?
Introduction
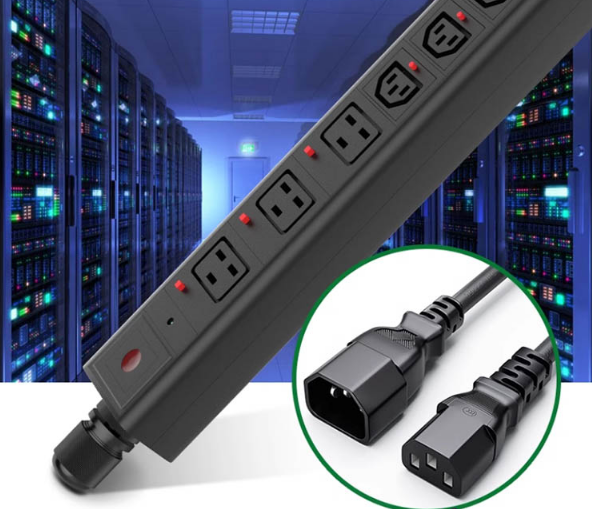
In the world of cryptocurrency mining, power delivery is just as critical as hash rate efficiency. A reliable power connection ensures stable operation, reduces downtime, and maximizes profitability. The C13 to C14 Professional Mining Power Cord is a high-performance solution designed specifically for Antminer series miners and other industrial-grade mining rigs.
This guide will walk you through the installation process while highlighting the key advantages of using a purpose-built power cord for your mining setup. Whether you’re setting up a new mining farm or upgrading existing infrastructure, understanding proper power cord installation is essential for long-term operational success.
Why Use a Dedicated C13 to C14 Mining Power Cord?
Before diving into the installation steps, it’s important to recognize why a specialized power cord matters in mining operations. Unlike generic power cables, the C13 to C14 Professional Mining Power Cord is engineered to handle the extreme demands of continuous high-load mining.
Key Advantages:
- Optimized Power Delivery
- Built with 3×1.5mm² oxygen-free copper conductors, this cord minimizes resistance and voltage drops, ensuring stable power flow to your Antminer.
- Anti-oxidation copper cores prevent degradation over time, maintaining efficiency even after months of 24/7 operation.
- Heat-Resistant & Durable Construction
- The industrial-grade PVC jacket withstands high temperatures common in mining farms, reducing the risk of melting or insulation failure.
- Reinforced connectors ensure a snug fit, preventing accidental disconnections due to vibration or cable strain.
- Perfect Length for Rack-Mounted Setups
- At 150cm (1.5 meters), the cord provides enough reach for flexible miner placement while keeping cable clutter manageable.
- Universal Compatibility
- Works seamlessly with Antminer S19, S17, T19, and other models that use C14 power inputs.
- Also compatible with PDUs (Power Distribution Units) commonly used in large-scale mining operations.
Now that we understand the benefits, let’s move on to the installation process.
Step-by-Step Installation Guide
Step 1: Verify Compatibility
Before connecting the power cord, confirm that your Antminer model uses a C14 power input. Most modern ASIC miners, including Bitmain’s Antminer series, use this standard.
- Common Antminer Models Using C14 Input:
- Antminer S19, S19 Pro, S19j Pro
- Antminer S17, S17+, T17
- Antminer L7
If your miner has a different power input (e.g., C20), you’ll need an adapter or a different cord.
Step 2: Inspect the Power Cord
Before installation, check for:
- Damaged insulation or exposed wires – Never use a frayed or compromised cord.
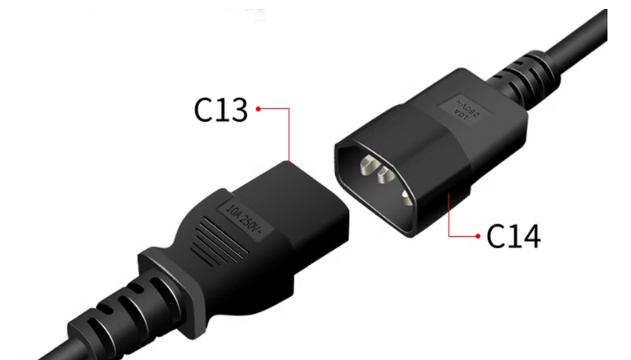
- Secure connectors – Ensure the C13 and C14 plugs are firmly attached with no loose parts.
Step 3: Connect to the Power Source
- For Direct Wall Outlet Connection (Single Miner Setup):
- Plug the C13 end into a high-quality surge protector or PDU.
- Avoid cheap power strips—miners draw significant current, and low-quality strips can overheat.
- For PDU Integration (Large-Scale Mining Farms):
- If using a rack-mounted PDU, plug the C13 end into an available outlet on the PDU.
- Ensure the PDU is rated for the total power draw of all connected miners.
Step 4: Connect to the Antminer
- Locate the C14 power input on your miner (usually at the back).
- Firmly insert the C14 plug into the socket until it clicks into place.
- Avoid forcing the connection—if it doesn’t fit easily, double-check alignment.
Step 5: Cable Management Tips
- Use Velcro straps or cable organizers to keep cords tidy and prevent tangling.
- Avoid sharp bends in the cable, which can damage internal conductors over time.
- Keep cables away from heat sources like exhaust fans to prolong lifespan.
Step 6: Power On & Monitor
- Turn on the power source (PDU or outlet).
- Boot up your Antminer and monitor for:
- Stable power readings (check via miner dashboard or monitoring software).
- No unusual heat at the connectors.
If you notice flickering power or excessive heat, immediately disconnect and inspect the cord and connections.
Troubleshooting Common Issues
Problem 1: Miner Not Powering On
- Possible Causes:
- Loose connection at either the C13 or C14 end.
- Faulty power source (test with another device).
- Damaged power cord (inspect for physical defects).
Problem 2: Intermittent Power Drops
- Solutions:
- Check for oxidized contacts—clean with electronic contact cleaner if needed.
- Ensure the PDU or outlet isn’t overloaded.
Problem 3: Overheating Connectors
- Prevention:
- Use only high-quality PDUs with proper load balancing.
- Replace worn-out cords before they degrade further.
Best Practices for Long-Term Reliability
- Regular Inspections – Check power cords monthly for wear and tear.
- Use Surge Protection – Mining hardware is sensitive to power fluctuations.
- Avoid Daisy-Chaining – Never plug multiple high-wattage miners into a single outlet.
- Invest in Quality Cords – Cheap cables can lead to fire hazards and reduced efficiency.
Conclusion
Installing a C13 to C14 Professional Mining Power Cord correctly is a small but crucial step in optimizing your mining operation. By following this guide, you ensure stable power delivery, reduced downtime, and enhanced safety for your Antminer setup.

Whether you’re running a single miner or a large-scale farm, investing in industrial-grade power infrastructure pays off in long-term reliability and profitability. Always prioritize quality components—your mining rigs depend on them!
Ready to upgrade your power setup? Choose a certified C13 to C14 mining power cord designed for high-load performance and durability. Happy mining!